There are many projects that can remotely manage NixOS in the most fabulous ways. But, let’s be honest… they seem daunting and overengineered for beginner to intermediate hobbyists. Is there a simpler way?
Use-Case Example: NixOS Homelab #
Why would you need to do this? Well, the reference scenario here is having a homelab. I’ve wanted to decouple my self-hosted services from my storage (I don’t want Docker running on my NAS), and slowly but surely transition to a fully MiniPC-based setup.
I got a pretty decent MiniPC to serve as a compute node, and NixOS is the perfect choice to run on it:
- Stable and reliable version pinning: Running against the stable branch of NixOS and using flakes gives me stability and full control over when any dependencies get updated.
- Effortless rollbacks: In the off-chance I mess some config up, I’m a boot menu entry away from rolling back to a stable state. The uneventful extended downtimes due to a bad update are a thing of the past.
- Declarative and reproducible: All software components are managed by a single config Flake you can track in Git. Want to mess around in a sandbox? Easily reproduced in a VM. Hardware died and needs a replacement? The system will set itself up from the config. Configure once, reuse forever.
So, I got a basic installation of a non-graphical NixOS on the MiniPC, converted it to a Flake, and configured a basic SSH server to allow myself to configure it remotely once I disconnect the temporary monitor and keyboard cables.
I now have a barebones homelab, completely self-contained and managed separately.
But now how could I edit these files in the most comfy way possible?
If you are a terminal editor enjoyer, I’m sure you will suggest just putting some vim configs on there and call it a
day, and that works!
But, I’m special… I prefer the comfort of a GUI IDE. Ideally, I would have something similar in convenience with my nixfiles setup, where I have a desktop entry for an IDE instance dedicated for editing my configs, but this time for my homelab. Right now though, all I had was an SSH connection. Hmmm…
SSH to the Rescue #
Why use SSH to get ourselves in the homelab, when we can bring the homelab to us?
We can use sshfs to make a FUSE mount, and see the files locally.
Then we can open it like any other directory!
This command mounts the NixOS flake directory from the homelab as a temporary directory on the main PC.
sshfs -o "uid=$UID" server@homelab:/home/server/homelab /tmp/homelab
After we are done, the connection can be closed:
fusermount3 -u /tmp/homelab
Normally, I’d use IntelliJ, but sadly VSCode has way better Nix support (as of now).
You can, of course, ignore me and use your editor of choice.
I will reuse vscodium for this, and set it so it runs a separate instance.
You could type this out everytime, but why not spend 5 extra minutes to automate it as a utility script?
With a simple Bash trap EXIT for cleanup, this is all we really need for a basic setup:
#!/usr/bin/env bash
set -euo pipefail # NOTE: Nix will add this for us, this is here for reference.

mountPoint='/tmp/homelab'
remoteAddr='server@homelab:/home/server/homelab'

cleanup () {
    sleep 2s # Give some time to VSCode to close mounted files graciously.
    fusermount3 -u "$mountPoint"
    rmdir "$mountPoint"
}

mkdir -p "$mountPoint"
sshfs -o "uid=$UID" "$remoteAddr" "$mountPoint"

trap cleanup EXIT

codium --user-data-dir "$mountPoint/.vscode/data" --new-window --wait "$mountPoint"
Nix-ify the Script #
The above script should be useful from any Linux distro, but if like me, you also use NixOS on your main PC, we can package it a bit more nicely with a very simple module:
{ pkgs, ... }:
let
  # Package the script so it is available.
  homelabconf = pkgs.writeShellApplication {
    name = "homelabconf";
    text = (builtins.readFile ./homelabconf.sh);
    runtimeInputs = with pkgs; [
      # You need sshfs-fuse available for the mount.
      sshfs-fuse
      # If you don't have a VSCode instance configured globally, you can
      # configure one with some useful extensions here.
      (vscode-with-extensions.override {
        vscode = vscodium;
        vscodeExtensions = with vscode-extensions; [
          tobiasalthoff.atom-material-theme
          vscode-icons-team.vscode-icons
          jnoortheen.nix-ide
          mkhl.direnv
          timonwong.shellcheck
          ethansk.restore-terminals
        ];
      })
    ];
  };

  # Make a desktop item for the script, so you can launch it from
  # a launcher / menu like `wofi` and skip the terminal altogether.
  homelabconfDesktop = pkgs.makeDesktopItem {
    name = "homelabconf-desktop";
    desktopName = "Homelab Conf";
    icon = "nix-snowflake";
    comment = "Open a code editor to edit the homelab's Nix configs via SSH.";
    categories = [ "Application" ];
    exec = "${homelabconf}/bin/homelabconf";
    terminal = false;
  };
in {
  # Add them to your packages.
  # This could also be done in HomeManager's `home.packages` if you prefer.
  environment.systemPackages = [
    homelabconf
    homelabconfDesktop
  ];
}
Bonus: Autolaunching Terminals #
One of the extensions in the list above was
restore-terminals.
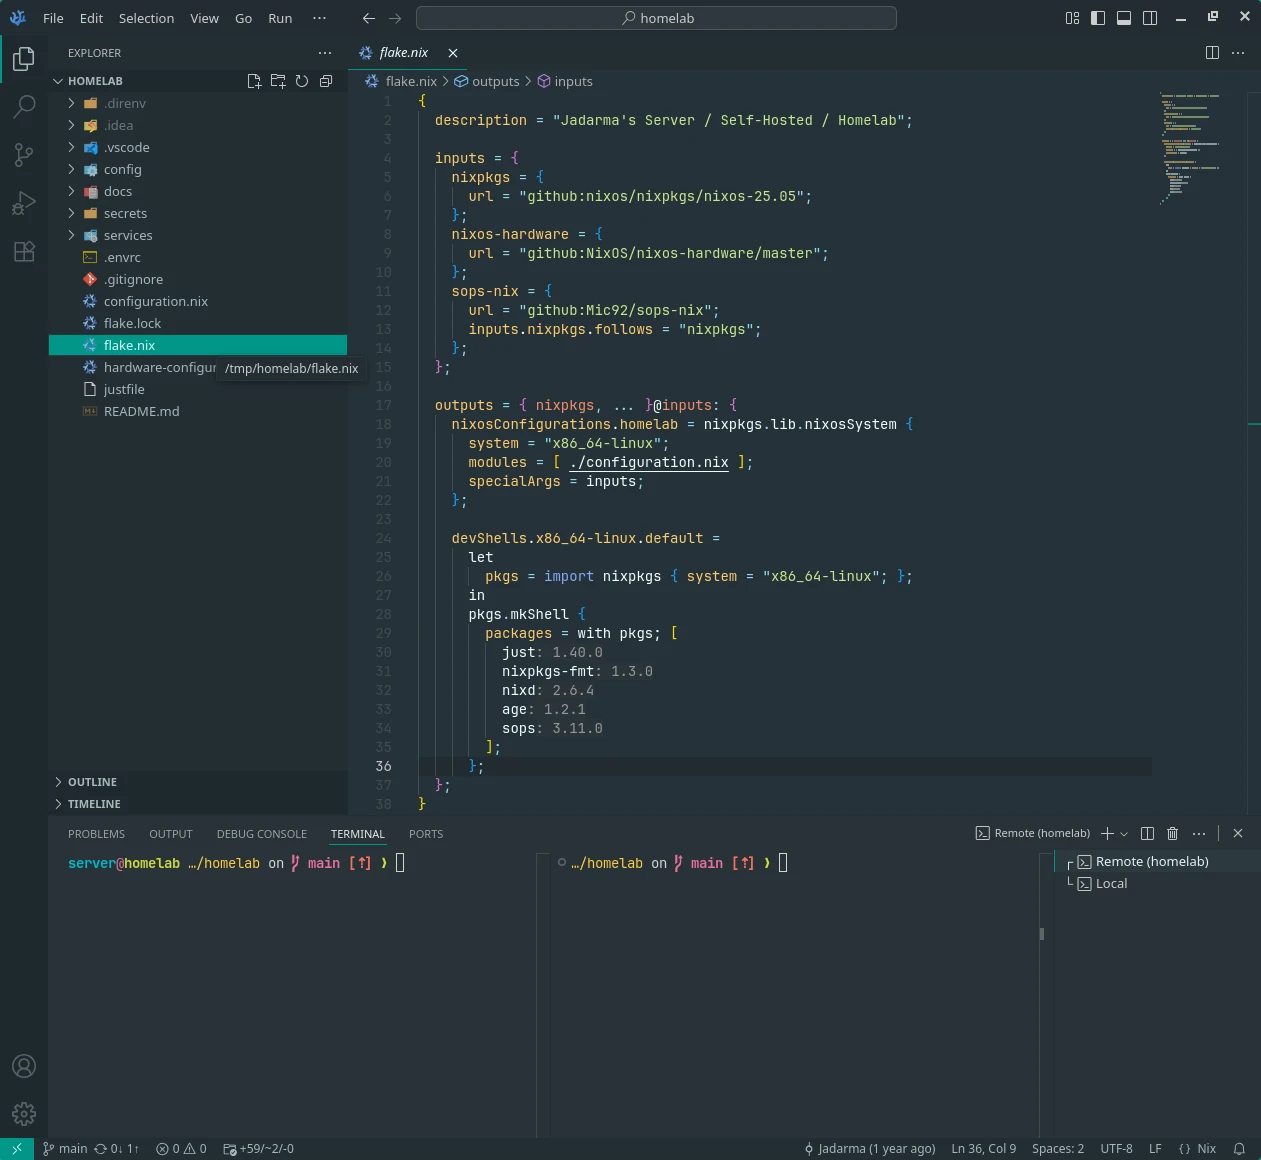
In the homelab flake repo, I added the following in .vscode/settings.json to have a terminal spawn on startup and
automatically SSH in the right location.
I also like to have a split with the local machine.
{
  "restoreTerminals.keepExistingTerminalsOpen": false,
  "restoreTerminals.runOnStartup": true,
  "restoreTerminals.terminals": [
    {
      "splitTerminals": [
        {
          "name": "Remote",
          "commands": [
             "TERM=xterm ssh server@homelab",
             "cd /home/server/homelab",
             "clear"
          ]
        },
        {
          "name": "Local"
        }
      ]
    }
  ]
}
In the end we get this:
Conclusion #
Assuming an already working SSH connection, it only took about 50 extra lines of Bash and Nix to get seamless integration. I simply run it from my launcher, like it’s just another application, and it teleports me on my homelab MiniPC. Amazing!
By tweaking the script to have a configurable target, you could reuse this logic for a few more PCs. At the moment I only have one homelab instance, and it will be a long while until I need to move to something more “proper”.
I recommend this setup to people who want something quick and reliable, that you can easily wrap your head around, and doesn’t get in your way, makes maintaining your homelab seem less of a chore and lets you focus on what really matters.